
Connect your eBay store
App guide · Start Here
Connect eBay before posting listings or managing eBay orders. You approve access once. Dropship Calendar then checks the connection, turns on live updates, and prepares your business policies.
Before you connect
Section titled “Before you connect”- Sign in to the eBay seller account you intend to use.
- Confirm the account can create listings in its eBay marketplace.
- Finish any required eBay account verification directly with eBay.
Connect the store
Section titled “Connect the store”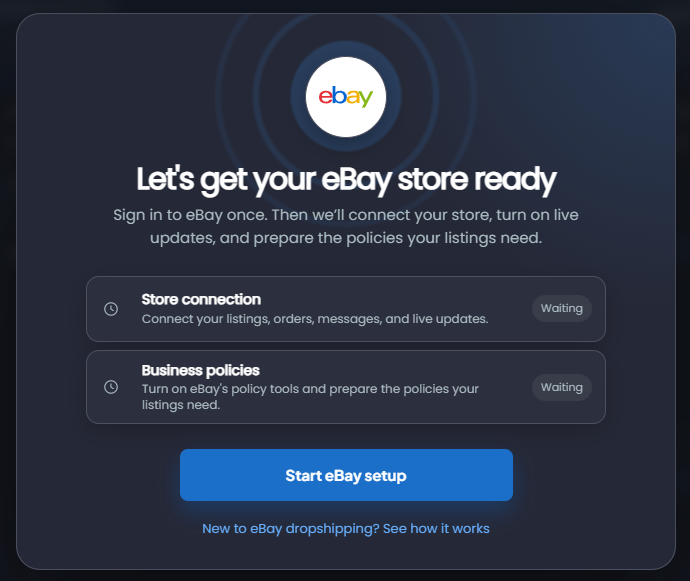
- On the required setup window, select Start eBay setup. You can also start from Settings → My Stores → eBay.
- Sign in to the eBay seller account you want to use.
- Review eBay’s permission page and approve access.
- Return to Dropship Calendar. Keep the page open while both setup rows finish:
- Store connection connects listings, orders, messages, and live updates.
- Business policies prepares the policies your listings need.
- Wait until both setup rows show Complete. During first-time onboarding, select Continue to dashboard when it appears.
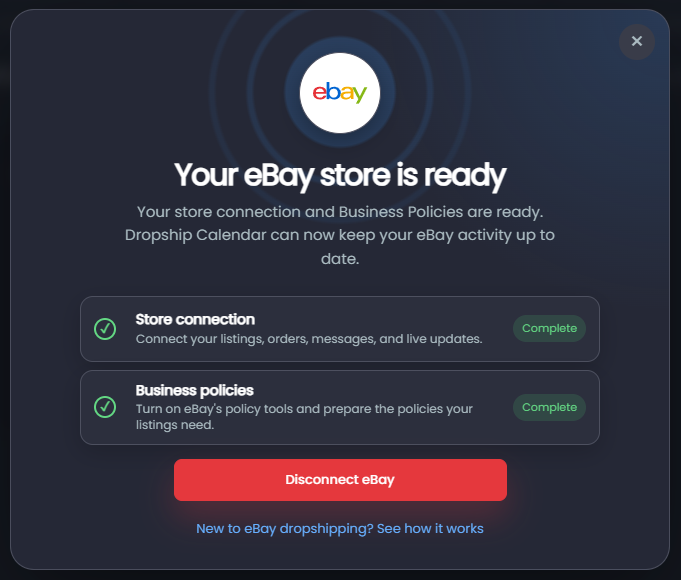
There is one connection button and one eBay approval. Dropship Calendar still performs several secure checks in the background; you do not need to approve each check.
Dropship Calendar binds policy information to the verified eBay seller. Connecting a different seller creates a separate policy context.
Reconnect an existing seller
Section titled “Reconnect an existing seller”- Select Reconnect eBay where Dropship Calendar shows that setup needs attention.
- Sign in to the same seller and approve access once.
- Wait while Dropship Calendar checks the store connection and existing policy selections.
Reconnect never replaces a valid policy selection. Dropship Calendar checks your saved choices and moves forward when they are still available.
Disconnect a store
Section titled “Disconnect a store”Open Settings → My Stores → eBay and choose Disconnect eBay. Disconnecting removes Dropship Calendar’s usable eBay access and stops live updates. It does not delete listings or Business Policies from eBay, and it keeps the seller’s saved policy history so a later reconnect can verify and restore valid selections safely.
After disconnecting, the setup checks are cleared because there is no current verified connection. Reconnect the same seller to see Dropship Calendar check the existing policies again.
If the wrong seller appears
Section titled “If the wrong seller appears”Stop before posting. Do not assume policies from one seller apply to another.
- Return to eBay and verify which account is signed in.
- Restart authorization using the correct account.
- Confirm the connected seller in Dropship Calendar.
- Open Settings → eBay Policies and review every selection.
Common problems
Section titled “Common problems”Business Policies need attention
Section titled “Business Policies need attention”Dropship Calendar tries to enable Business Policies during a first connection. If eBay requires a seller action or a policy choice, follow the message shown in setup and choose Review policies.
Refresh does not change the policy list
Section titled “Refresh does not change the policy list”Confirm that the intended seller is connected, then choose Refresh policies once. Refresh checks eBay’s current policies and does not replace a valid selection.
Authorization returns to the login page
Section titled “Authorization returns to the login page”Allow the eBay authorization flow to finish in one browser session. If it continues, capture the time and sanitized error text and contact support.
Next step
Section titled “Next step”Continue to Review your store settings before walking through the complete listing workflow.